Showing posts with label casserole. Show all posts

Saturday, January 5, 2008

Haggis!


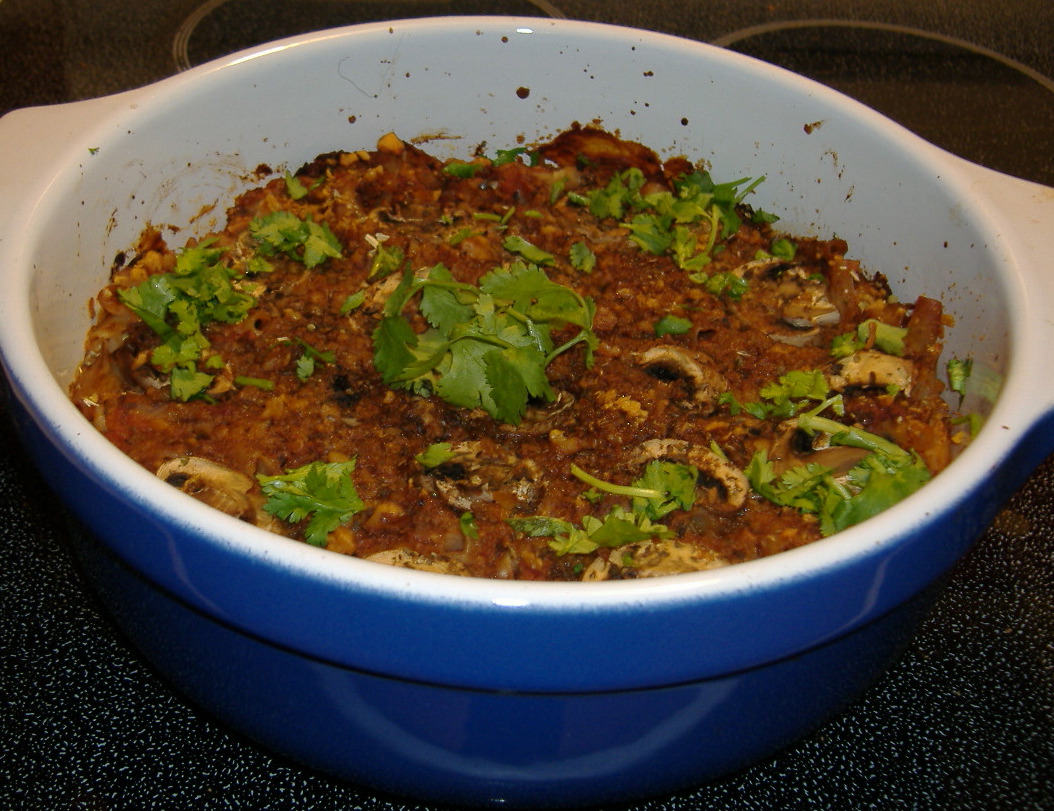
This is a veggie haggis - all baked and ready to be enjoyed by those who, for reasons known only to ourselves, feel that something particular to our heritage (or part of it) should be consumed at some time during the year. Sound familiar? :) The haggis (in its distinctly non-veg version) is traditional on Burns Night, 25 January, in honour of the Scottish poet. In our household, we like that too - but my husband also asks for it for New Year. Why not! so I make enough to do for both and freeze half!

HAGGIS

I’ve made this a couple of times now - it is a work in progress, evolving, etc. There are soooo many recipes for this dish that you really can’t go too far wrong. Here’s my latest version:

ASSEMBLE THE FOLLOWING:

1-1/2 cups cooked kidney beans (homemade or from a can, drained)
3 oz (by weight) green lentils
2 oz (by weight) pot barley
2 bay leaves
2 oz (by weight) steel-cut oats
1/4 cup regular rolled oats
1/4 cup dried TVP granules
4 oz carrot (by weight), minced
6 oz onion (by weight), minced
4 oz mushrooms (by weight), minced
2 cloves garlic, minced
juice of 1/2 lemon
1 tsp Marmite (optional)
1 Tbsp low-sodium soysauce
1/3 cup Scotch
1/4 tsp sage
1/4 tsp rosemary
1/4 tsp paprika
1 tsp dried parsley
grating of fresh nutmeg
1/4 tsp or so of cumin
1/4 tsp tumeric
sprinkle of cinnamon
salt and black pepper - to taste
dash of cayenne or two - to taste (optional - I’ve made it with the cayenne and without it)
You’ll also need water or stock to rehydrate the tvp and to soak the oats as well as to ‘saute’ the vegetables (if you don’t use oil) .

TO MAKE THE HAGGIS:

Pre heat oven 375F

Put the oats and the tvp together in a bowl and add enough stock or water to come up to about 3/4 of the contents. Leave until the mix has absorbed all the liquid and is dryish. This can take about 45 mins or so - but it all happens quietly while the lentils and barley are cooking.

Cook the lentils and barley with bay leaves. When done, remove leaves, drain pan very well, and set aside.

Puree most of the Kidney beans except for about 1/3 cup to add whole.

‘Saute’ the onions, garlic, mushrooms and carrots in a little water (or stock if you have it) until they go a bit soft - 5 to seven minutes should more than do it.

Add the lemon juice, Marmite, soy sauce, scotch, spices and stir well. Add the pureed kidney beans, the whole kidney beans, the oat and tvp mixture, and the lentil and barley mixture. Stir well and taste for seasoning.


Add more water or stock if it looks a bit dry, but you won’t want it soupy.

Put into an lightly oil-sprayed ovenproof casserole and cover. Bake for 30 to 45 minutes. If you would like a crispy top (it’s nice :) ) you should remove the cover for the last 10 minutes.

While the haggis is in the oven, now's the time to cook the potatoes and turnips that go with it! I add all kinds of things to mashed potatoes - and that includes nutritional yeast, turmeric, and goodness knows what else. You please yourself. The turnips I like pretty well plain.


Glamorous it is not, but it certainly was good to eat! My husband was delighted - and that's what it was all about! ;)

NOTE:
You could use just one kind of oats - I chose two for added visual interest and texture. Barley is a nice touch, but many recipes don’t have it. Other beans? I think you need the darker colour of the red kidney beans for this kind of dish. Use brown lentils rather than green if you prefer, but I wouldn’t advise using red lentils - too soft. Save some scotch for a toast.

Wednesday, January 2, 2008

Variations On A Theme: Baked Pasta With Spinach, Gluten And Mushrooms

[Edited because I mistakenly added in part of another recipe - would ya believe!!!! Time for a rest!]

A little while ago I posted a pic and recipe (sort of) for something I whipped up on a slow day in the kitchen (or was it a frantic day? Point is, I made it from what I had on hand - AND I was feeling relatively lazy!). It was a Mushroom Pasta Bake and it was GOOD :)

Shortly thereafter I did a variation on that one. Feeling that I needed to use up some things in the freezer (in this case, some seitan/gluten I had made) and the refrigerator (in this case mushrooms - I always have mushrooms and use any excuse to use them up!), I decided to do another 'bake'. Tofu I usually have in because I buy some of those shelf-stable aseptic packs of silken tofu that I use whenever I run out of the regular tofu. Besides, silken is great for sauces and such - so there!

So here's my 'Variation On A Theme':

BAKED PASTA WITH SPINACH, GLUTEN AND MUSHROOMS


Following the previous recipe, more or less (see above) I assembled the following:

3 or 4 ounces quinoa macaroni, boiled just short of al dente and drained (or use whatever small pasta you prefer)
4 or 5 ounces mushrooms, chopped small
1 10-oz pkg frozen spinach, thawed and drained very very well
A few ounces (about 1 cup measure) of my own homemade gluten roast (seasoned as if for roast b**f), minced
Liquid from cooking the gluten roast (half a cup or so you could substitute a good strong veg stock)
1/2 pkg low-fat tofu (you might want to use more so that you have extra sauce to pass at the table)*
soymilk and/or stock - enough to thin out the tofu to a cream consistency*
2 cloves garlic, chopped
1 Tbsp vegan worcestershire sauce (optional but we like it most of the time)
3 Tbsp nutritional yeast
1 - 2 Tbsp lemon juice
black pepper
1 Tbsp white miso
herbs according to taste
salt and pepper throughout to taste
Nutmeg for the spinach
crumbs or vegan parmezan cheez for topping (I used my own mix that I keep on hand)

I cooked the pasta and while it was doing its thing I sauteed the mushrooms in a little stock and low-sodium soy. My spinach wasn't completely thawed, so I put it on a low heat at the back of the stove to finish defrosting. I had previously chopped the wedge of gluten roast (you could use some kind of commercial seitan - depending on flavour) very finely - to make it seem like soy crumbles.

When the mushrooms are shrunk to half their size and looking good :) add the gluten/seitan and its cooking liquid or stock. At this point you might need to add a little wholewheat flour to thicken this mixture (stir quickly so it doesn't glom) and add more stock, a bit at a time, until you have a good consistency for a gravy. Let this cook a little to take away the raw taste of the flour. Everything tasting good? (Need salt and pepper? More stock?) A nice rich 'gravy' is ideal here. Okay, set it aside.

For the tofu topping:
Mix the tofu with the remaining ingredients (except for the nutmeg and crumbs) until it tastes the way you want it to. This is a subjective matter and I even change my mind from day to day what I like to have in this kind of dish. You decide. You will want this to be nice and creamy - sort of like a thickish yoghurt.

* Alternately, you could simply whisk a some silken tofu with whatever you like of the same ingredients for an easier topping.

TO ASSEMBLE AND BAKE:

Pre-heat oven to 375

Spoon the spinach into the bottom of a lightly oil-sprayed casserole, grate on a little nutmeg.


Add the macaroni-mushroom-gluten mix in a nice even layer over the top of the spinach.


Next comes the tofu sauce.


As you see, I kinda dump it in spoonfuls over the top then spread it with the back of a spoon to more or less cover. If there's more than you need, fine - it makes a good sauce to pass at the table. If not, then don't sweat it.

Finally top with crumbs, a mix of nuts and nutritional yeast or vegan parmezan cheez - whatever your heart desires :)

And here it is


- all ready to go in the oven for (how long did I say?) 20 minutes, lightly covered with foil, then remove the foil for a last few minutes to brown a little. The timing will depend a little on the heat of your oven (they all differ a bit) and the size and shape of your baking dish.

This had a rich 'meaty' taste - and the spinach was a pleasant complement to the rest of the dish. I'll do it this way in future.

NOTE: I tend to make things a little on the dry side by some people's standards, because we don't care for 'soupy' dishes - unless we're having soup! LOL You may want to add more liquid to everything, more sauce, depending on your taste. Just note as you go along whether or not it looks right to you, okay?

Friday, December 14, 2007

Mushroom & Tofu Pasta Bake


I'm always searching for new ways to take a lazy way out of cooking - which by the way I profess to love most of the time - without compromising my promise to myself to cook from scratch (well, I don't make my own pasta anymore and never make my own tofu or soymilk, so . . . .LOL ). Somehow - it must be because the oven makes the place so warm and cosy - I've taken to popping pasta dishes and other kinds of things in the oven and then sitting back and waiting for them to be ready!

Here's what I did the day before yesterday - and I'm including a lot of photos cuz someone asked me to do step-by-step and so here it is LOL

But first a word about the pasta itself. I found the most delectable kamut spirelli in one of my favourite shops and thought I'd try it out:


I'm sure it comes in many other brands, but this one is organic and is actually available in Ontario! Anyway, here we go:

MUSHROOM & TOFU PASTA BAKE

(for 2 hungry people or 3-4 lighter eaters)

125 g (4 or 5 ounces in weight?) spirelli (you could use penne or whatever) pasta, set aside until ready to cook.
250 g (1/2 lb.) Mushrooms, sliced (measurements can vary - use what you have)
1 Tbsp low-sodium soy sauce
150 g (around 5 or 6 ounces in weight?) Zucchini, chopped (ditto)
1/2 pkg low-fat tofu (you might want to use more so that you have extra sauce to pass at the table)
soymilk and/or stock - enough to thin out the tofu to a cream consistency
2 cloves garlic, chopped
1 Tbsp vegan worcestershire sauce
3 Tbsp nutritional yeast
1 - 2 Tbsp lemon juice
black pepper
1 Tbsp white miso
crumbs or vegan parmezan cheez for topping (I used my own mix that I keep on hand)
herbs according to taste

Method of sorts:

Preheat oven to 375 F.

Saute your mushrooms - I do it in a little water with a Tbsp low-sodium soy, since I avoid using oil if at all possible.

While you are doing the mushrooms (only a short while - you'll want them to shrink to half size and look 'cooked'), boil some water and drop your zucchini into it for a couple of minutes only - or you could lightly steam them. You don't want them to go at all mushy. When these are done, drain and set aside.

Cook that pasta before you forget!


This kamut pasta is so pretty, isn't it, and it only takes a few minutes. Here it's still in its raw, dried state, but I thought the colours were nicer than I'd ever seen! Pop it into boiling water and keep an eye on the time - I only did mine for about half the time it called for, but you be the judge. You'll want your pasta, regardless of which kind you use, to be a little underdone because it will cook more in the oven.


When the mushrooms are ready, add the zucchini (I cut mine into small pieces so that they didn't take long to blanch and so that they'd mix in with the size of everything else. You might want to decide to do it differently)


and season to taste - but remember that you're going to have a seasoned tofu sauce over the lot, so go easy on salt etc.

Here we are again, all ready for the sauce.


For The Sauce:
Crumble the tofu, add enough soy milk or other liquid (do this a bit at a time) to make it possible to blend into a creamy sauce with a blender or a wand blender. Blend in the garlic and all other ingredients. Taste for seasoning and adjust. Sometimes it's the addition of a little vegan worcestershire sauce that helps a whole bunch, sometimes it isn't needed. Your choice.

Er, no pic of the sauce being made. We're going to just have to live with that. Imagine white. Got it? Okay, onwards!

Stir the sauce, pasta and vegetables together and turn into a baking dish which has been sprayed or lightly wiped with a faint film of olive oil. Here it is:


Top it, if you like, with crumbs, vegan parmezan cheez, or other appropriate crumby topping - or leave it plain. Your choice.


Yeah, well, you're right - it's the same image you got at the top of this post. Life's full of surprises, eh?

Bake for around 20 minutes. I cover mine with a layer of foil, very loosely, and take it off in the last few minutes.


And here it is baked. Now a warning for those like me who like to leave it in the oven until they've finished the first course:
If you leave it too long, it will dry out - but hey that's what that extra sauce I mentioned in the ingredients list is for. This recipe is so forgiving of absent-minded cooks!

Serve with whatever you like - we had ours plain the first day. But we did have a salad beforehand! :)

Monday, December 3, 2007

Eggplant Spiced North Indian Style, Baked Macaroni Bolognese

Those who know me know that I am essentially a lazy cook. I cook from scratch, but I take short cuts and I prefer things that can be left to cook themselves while we relax a bit before the meal. It helps if they can be kept warm on stovetop or in the oven (crockpot too) while we have our salad course.

These two meals were easy for me - and for that reason I'm likely to have them on the menu again and again.

EGGPLANT SPICED NORTH INDIAN STYLE


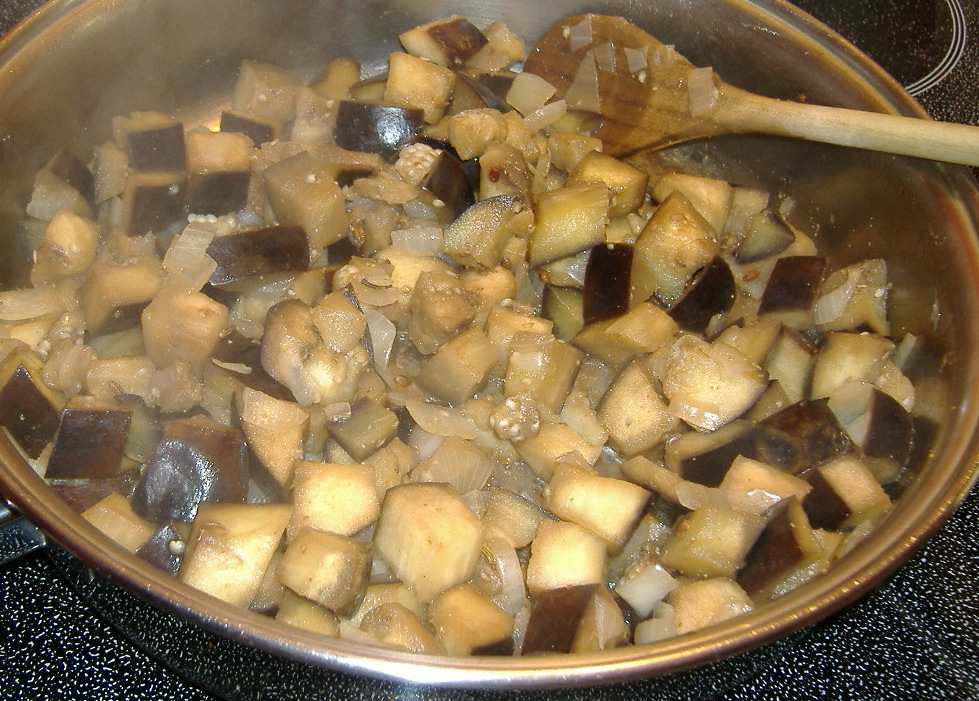
I thought a bit about what to call this dish - it originated as one of Madhur Jaffrey's in her Eastern Vegetarian Cooking. However, I adjusted the seasoning quite a bit so that it probably violates the whole idea of naming it after any region. In additiion, I made it for two persons, which always messes with a recipe (you can rarely just cut a recipe by two-thirds anyway, and I didn't), and of course I omitted any added fat/oil, as per usual, and omitted the salt. The proportions of spices were adjusted to suit our taste (and to compensate for the lack of salt). The method and the seasonings changed, that's what :) but the eggplant and onion stayed. The results were very pleasing to us. Here's my renamed version.

1 lb eggplant, cubed (I left mine unpeeled - looks so pretty that way)
1 medium onion, chopped
1/2 tsp fennel seeds
1/4 tsp fenugreek seeds
1 tsp coriander
1/2 tsp cumin
1/4 tsp cayenne
1/2 Tbsp lemon juice
salt to taste, if used

I put all ingredients except for the lemon juice into a large skillet (I can see what's happening better that way) and stirred over medium-high heat with enough water to keep it all from burning, allowing the spices to get thoroughly mixed through and to coat the vegetables. Then I added around half a cup of water, covered, and lowered the heat for around 20 minutes to half an hour - well, it might have been a little longer - until the eggplant was cooked through but not mushy. Stirring every now and then helps - and it lets you keep any eye out to add more liquid if it looks as if it's going to burn. During one of those stirrings I added the lemon juice.

When done - and you know how you like your eggplant to be - taste for seasonings (you might have wanted salt, so add a little more if necessary).


Serve with brown rice and whatever salad-like things please you. Indian accompaniments would be best, but it's a versatile dish. Lovely way to take your veggies!!!


The next one is a really lazy dish -


BAKED MACARONI BOLOGNESE


Yesterday I was stuck for ideas, so I thought why not just re-run Saturday's lunch - spaghetti bolognese (or is that 'bolognaise'? Never mind!). I had made this from mushrooms and tvp plus all the usual suspects required for a good tomato pasta sauce. It had been very good. You can find the recipe HERE - except this time I had lots of mushrooms and therefore used more.

I cooked some quinoa macaroni (love that stuff!) - or I should say I deliberately undercooked it - while I reheated the bolognese sauce and added a little more tomato paste and stock along with another half dozen or so quartered mushrooms, jazzing it up with more chilies and more nutritional yeast - this dish was not going to be boring! I then mixed together the sauce and macaroni, saving a little sauce for the top, and dumped it into a casserole.


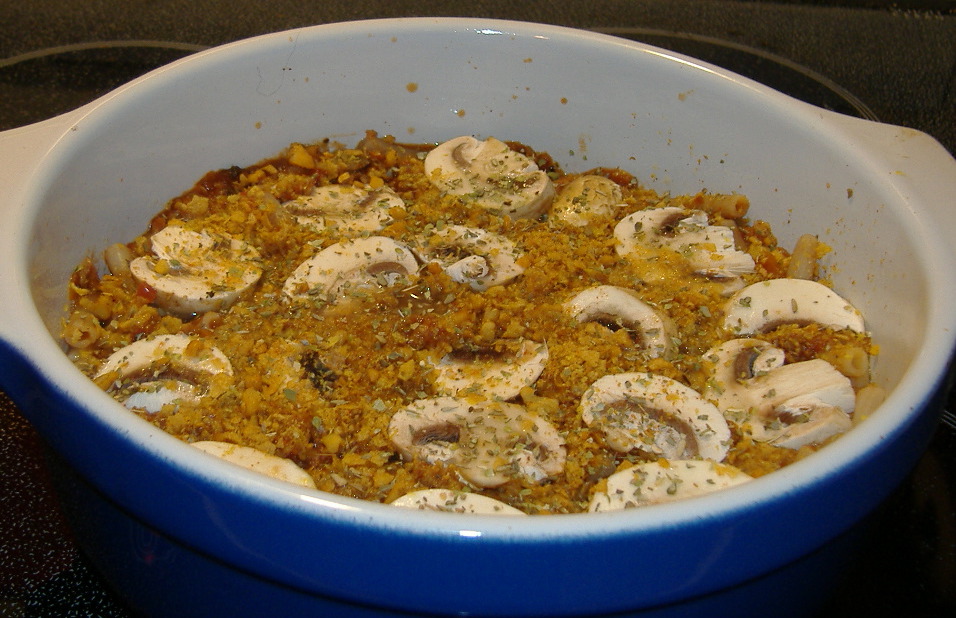
As you see I also added a cheezy crumb topping and paved the surface with some sliced mushrooms. Lightly covering with some aluminum foil, it went into the oven (375 F) for around half an hour then spent a little time with its cover off while we had our salad. Easy. (Okay, so it was just 'leftovers' - but it was still good and still easy! LOL)