Showing posts with label Recipes. Show all posts

Friday, February 13, 2009

Bonus with 'Wake Up To Spice'

[EDITED TO CORRECT AN AMBIGUITY IN THE TIMING FOR THE BONUS OFFER]


Just to inform you all that my e-cookbook Wake Up To Spice now has a bonus attached: When you buy the cookbook this month (February) you get, free, Erin Dame's special report 7 Strategies to Successful Weight Loss! (This is normally a $5.00 cost, given for the rest of February to those who wish to dowload WAKE UP TO SPICE.)

In any event, you can sign up for Erin's free newsletter and download a sample recipe from my collection for only a click of the mouse. Not a bad deal!

Take a look and see what you think! You can find the whole deal HERE.

Sunday, March 25, 2007

Crockpot Ratatouille, Chickpea Patties With Sauce


I'm a little behind with a couple of items for this blog, so some of these entries today will be a bit, er, disordered. But here goes! My husband and I decided to make Ratatoille again the other day (Thursday? Yes, it was.) - it's such a useful way of eating all one's favourite veggies at once and having wonderful leftovers to use for something else. It works fine chilled or at room temp too, if it lasts that long :)

Anyway, this time I made a double amount and added some lovely basil to the mix. I was going to be busy so popped it into my slow cooker for around three hours on high. It quite filled up my cooker, but by the time the veggies were tender, it had shrunk down nicely, as you see here.

The addition I made was a small can of tomato paste (mine says 5.5 ounces) which I stired in at that point. It looked great and smelled even better.

Of course, that left me with a slight problem of what to put with it - so I raided the refrigerator and found some cooked chickpeas left over from a batch of hummous. Hmmmmm. chickpeas with - what? I mashed the chickpeas with a potato masher (just over a cup of the little honeys), zapped some wholewheat bread in the mini-processor to produce around 3 Tbsp crumbs, ditto a chunk of zucchini to produce ca. 3 Tbsp grated zucchini. I added two finely chopped green onions, a dash of hot sauce, a spritz of Braggs, a sprinkle of sage, a grind of black pepper and bound it all together with a flax 'egg'. I think that was it. [EDIT: I forgot to say I added a sprinkle of raisins! Sorry.]

Formed into patties they browned in my cast-iron pan (with just a quick spray of cooking oil/Pam). I thought they looked a little naked, so I heated up a few tablespoons of the last of my Roasted Red Pepper Pasta Sauce from Wednesday.

By the time the flavour of the tomato paste had melded nicely with the ratatouille, thickening it nicely, the go-withs were ready. A quick green salad quickly thrown together, and we were ready to eat. Somehow, however, the plates didn't get a chance to get photographed!

My husband didn't think the sauce on the patties was needed, though, and I agree. Overkill.

Saturday, March 24, 2007

CARROT AND ROASTED PEPPER SOUP

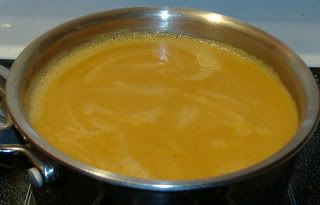
While I was still using up those jarred red peppers (they did go a long way - good value!), I made this soup a few days ago. It was surprisingly good - and I'm not a big fan of carrots. The recipe is adapted from one by Jennifer Raymond in Neal Barnard’s Eat Right, Live Longer, changed for a quick and easy version with a little more zip.

CARROT AND ROASTED PEPPER SOUP

1/2 yellow cooking onion, chopped
3/4 pound peeled baby carrots, chopped
2 cups water
3 or 4 roasted red peppers from a jar
2 cups low-fat soymilk
1 Tbsp balsamic vinegar
1 Tbsp freshly squeezed lemon juice
dash cayenne
freshly ground black pepper to taste
salt to taste

Cook the onions and carrots in a saucepan with the water until carrots are done (15-20 minutes, depending on how large the pieces of carrot are).

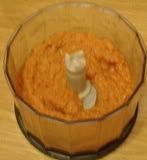
In batches, put the contents of this saucepan into a blender with the roasted peppers and a little of the soymilk so that it blends easily.


Photo Sharing and Video Hosting at Photobucket


Return the blended carrots, onions and pepper puree to the pan along with the rest of the soymilk if not all used in blending. If soup looks too thick (depends on how much cooking liquid you had left in that pan), add a little water to get it to the desired consistency, but soup should be thick and creamy still.

Add the balsamic vinegar, lemon juice, cayenne, pepper and salt, stir well, reheat and serve.

Serves 4.

Thursday, March 22, 2007

RYE BREAD

Photo Sharing and Video Hosting at Photobucket


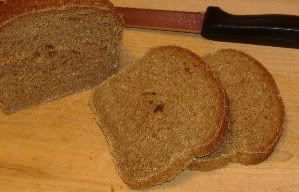
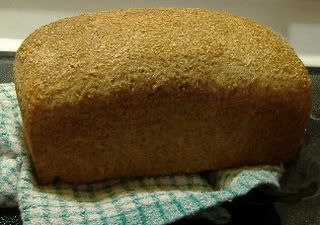
My latest attempt at rye bread turned out much better than others, I am happy to report! (Did I ever confess that I'm not all that good at making rye bread? It's usually far too heavy.) However, this time, I seem to have got the mix of flours, the kneading time and the rising time - and no doubt the congruency of the stars and/or the weather and my mood had something to do with it - pretty well spot on.

I made a single loaf:

1 Tbsp yeast
1-1/2 cups whole wheat flour
1-1/2 cups rye flour
1/2 tsp salt
3 Tbsp wheat gluten
1 tsp fennel seeds
3/4 tsp aniseed
1 Tbsp molasses (mixed in with a little of the water)
water - oh I dunno, about 1-1/2 cups I think

I did the usual things - put the yeast to rise in the right degree of warmth of water with a little flour and a pinch of sugar until it showed it was going to work. I sifted together the dry ingredients and then (I tend to do breadmaking backwards, and if I try to reverse it and do it in the conventional way I get a flop) added the yeast mix to the dry ingredients and added the water and molasses and then more water, mixing it with my hands, until it looked as if it was starting to form a good kneadable dough.

I turned the glom of flour and water etc. onto a lightly floured board and kneaded it for 10 minutes, let it rest for 10, then kneaded it for another five. (I always time all this, because I either cheat the time or I forget how long I've been playing with it - I get mesmerized by kneading bread!)

When it was beautifully smooth etc, it went into into a lightly oiled/sprayed bowl and was covered with a cloth for 1-1/2 hours, at which time it had doubled in size. I punched it down, kneaded it a bit more and formed into a loaf and set it in its pan, covered again, to rise for around another hour - it had doubled again, or nearly so. Baked for 40 minutes or so at 375F.

But I swear it all has to do with the moisture in the air, outside and inside, the temperature of the kitchen, etc. etc. - and the mood of the breadmaker and/or the yeast.

I have yet to make a rye sourdough. That's another challenge.

Wednesday, March 21, 2007

Roasted Red Pepper Pasta Sauce

Photo Sharing and Video Hosting at Photobucket


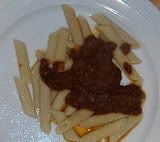
Today I tried a recipe from fatfree.com for a Roasted Red Pepper Pasta Sauce. I had wanted to use up the jar of roasted red peppers I had started a few days ago (for the Rotini, remember? - Rotini with Broccoli & Tomatoes) - and so googled and scouted around a bit. What I found was Mikes roasted red pepper pasta sauce which would use up all but three of what I had left. Made with already-roasted peppers, this was a Quick-and-Easy Fix for lunch.

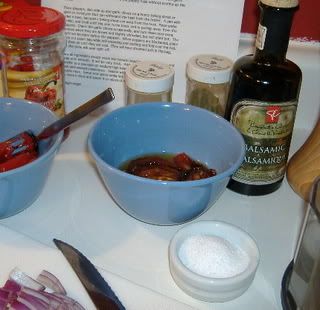
It took two red bell peppers per person, so for two of use I used 5 of the jarred peppers, plus garlic, onion, sundried tomatoes, herbs and balsamic vinegar. Got all that!

I did as was asked - except my peppers were already roasted - and blended the ingredients, adding in some of the tomato soaking liquid as suggested. heated it and seasoned it and there it was, in no time at all!
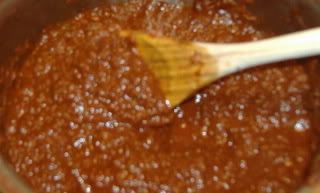
Photo Sharing and Video Hosting at PhotobucketIt was thick and beautiful and tasted wonderful!

We had it with wholewheat penne and a side salad. A great lunch.
Photo Sharing and Video Hosting at PhotobucketPhoto Sharing and Video Hosting at Photobucket

Sunday, March 18, 2007

WHOLEWHEAT SOURDOUGH BREAD

Sometimes this bread, like other breads, is a little temperamental. Yesterday it was having a bad hair day, but the results were very very tasty if not exactly perfect.

There are all kinds of ways of getting or making a sourdough starter, it seems, and everyone has their own 'Only Use' formula. I decided to keep it simple last October. I made my own sourdough starter from instructions in Barnard and Kramer's How It All Vegan(1999), p. 121. It's simple - no yeast, just flour and water. 1 cup of wholewheat and 1 cup of water stirred together in a clean dry jar and covered with a cloth for 3 to 5 days in a warmish place, out of a draft, for 3 days (or they say up to 5) but mine was ready sooner. You stir it every 12 hours. It will bubble and smell sour, after which it can be stored in the fridge in an airtight container. Use it once a week OR if you can't do that each week, remove half a cup of starter and replace with half a cup each of flour and water, stir well, let sit out a few hours and return to the fridge. (More details in the book - or available on the net.)

The bread recipe is equally simple. This is simply halving the recipe (there are just two of us so I only make one loaf at a time - and cut that in half and freeze the other half) and changing a few of the method details.

WHOLEWHEAT SOURDOUGH BREAD


Photo Sharing and Video Hosting at Photobucket


With all ingredients at room temperature, the evening before you want to bake the bread -

Sift together:
3-1/2 cups wholewheat flour (they suggest wholewheat pastry flour)
1 tsp salt
3 Tbsp instant gluten

Add:
1/2 cup or more (depends on your starter, you have to figure this out as you work with it)
1-1/4 cups water (depends on how wet your starter is - you may need a little more or less, so don't use all at once)

Mix carefully, adding the water, until all the ingrediets are in a nice semi-sticky mess. Knead it a little in the bowl then turn out onto a lightly floured board and knead until it is smooth. I usually knead for around 10 minutes, depending on the mood of my ingredients, the weather and the configuration of the stars (joking with the last, but not with the first two). As with any bread, you will need another handful of flour to help with the kneading process.

Place kneaded dough into a lightly oiled/sprayed ceramic bowl, rolling it around until it's all lightly covered in a film of the oil. Cover with a clean tea towel and set in a warmish place to let dough rise overnight or at least 12 hours.

Next morning, check the bread - it should have doubled in size. Punch it down and return it to the board to knead for another 5 minutes. Put in a prepared loaf pan. (You can also shape into a round and place on a cookie sheet, but I don't). Cover with the tea towel and let it rise until the dough doubles in size again - about 6 hours.

Place in a pre-heated 375F oven for around 50 minutes or until golden. Test with knife to see if done.

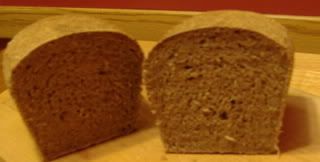
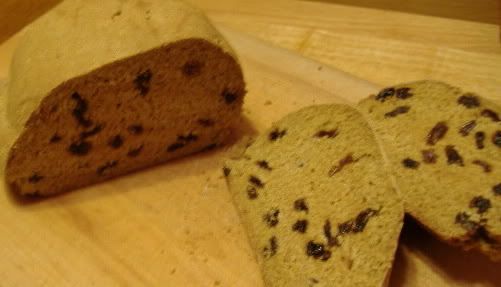
Photo Sharing and Video Hosting at PhotobucketHere is my offering of yesterday, cut to show the crumb. It is a lovely flavour and texture, but it lacks the 'holes' in it that are the mark of a good sourdough.


I have since found this site: The Fresh Loaf which has a good discussion on sourdough which I intend to study. Trouble is, depending on which site one visits, everyone seems to have a different idea.

IRISH SODA BREAD

Confession time: I am addicted to making bread BUT I am not the world’s best breadmaker. Do I let this stop me? Not a bit of it. My worst errors I toss or make into breadcrumbs (after my little hounds have had a tiny treat). My semi-failures I use while still warm and fresh (nothing like that just-out-of-the-oven smell and taste to improve a poor loaf!) and cut up the rest for croutons (after my little hounds have had a tiny treat). My successes (other people’s failures) we happily gnaw our way through and actually prefer to bread from any bakery. Then I go on and make more bread.

The one excuse I offer: I use ONLY wholewheat flour - not half and half wholewheat with unbleached all-purpose or such combination that I know is a sane choice. The loaves are naturally denser than they might otherwise be. My yeast breads are fine - nothing to blush about there - and my quickbreads likewise except on very rare occasions.

That said, I had a couple of very doubtful (let you figure out where they fit into the scheme of things above) loaves from the oven yesterday. Sourdough and Irish Soda Bread. First . . .

The IRISH SODA BREAD
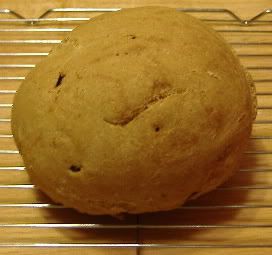
I made this on a whim (it was Paddy's Day, after all) and - although I hadn’t made it without baking powder ever before - decided to combine two recipes I found on the net. Prescription for disaster. It was, however, an interesting experiment - and it tasted fine, just a bit on the dense side.

I used the following ingredients:

2 cups wholewheat pastry flour
2 tsp baking soda
1 Tbsp sugar
1 tsp salt (this turned out to be too much for us)
1/2 cup raisins
3/4 cup soy milk (low-fat)
1 Tbsp vinegar

I mixed the lot as you’d expect, turned the soft dough out onto my floured bread board, kneaded it for a few minutes until it felt ‘right’, shaped it into a round, let it rest a few minutes, and popped it onto a flat pan and into a 375F oven for 30 minutes, forgetting to slash the top (I DO keep forgetting to do that for some reason).
Photo Sharing and Video Hosting at Photobucket
It came out as a strangely shaped little loaf that was very dense in texture and very good in taste. I shall work on this one.

Photo Sharing and Video Hosting at Photobucket

Saturday, March 17, 2007

ROTINI WITH BROCCOLI & TOMATOES

Photo Sharing and Video Hosting at Photobucket


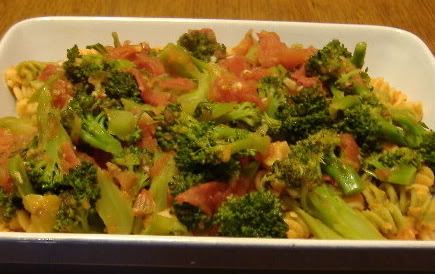
This recipe is adapted from one by Jennifer Raymond in Neal Barnard’s _Eat Right, Live Longer_ (1995), p. 318. The original served twice the number of people, had less roasted red pepper, proportionately, and contained tahini and olive oil. (I am experimenting with cutting all oils out of all recipes right now.) The cooking instructions are changed to allow for no oil and for my hang-up about keeping fresh tomatoes actually tasting fresh :)

ROTINI WITH BROCCOLI & TOMATOES

Serves 3 or 4.

6 ounces rotini pasta (I used the tricolour kind, because I wanted to make it pretty)
2-3 large garlic cloves, very finely minced
1/4 tsp crushed red chilies (or more to taste)
Abt. 3/4 pound broccoli (half a bunch), cut into florets
Abt. 2 large tomatoes, diced (my single tomato weighed in at ca.12 ounces)
1 cup cooked chickpeas/garbanzo beans (if you use canned, save the liquid)
1/3 cup roasted red peppers (mine from a jar purchased for the recipe)
1-1/2 Tbsp lemon juice
1/4 tsp (or to taste) freshly ground black pepper
salt to taste

Photo Sharing and Video Hosting at PhotobucketPrepare your vegetables.

Put the water on for the pasta and then cook it according to package instructions. Drain and set aside.

Meanwhile, in a skillet set over medium-high heat, add the broccoli, garlic and chile flakes with abt 1/3 cup of water, mix very well to coat the broccoli with the flavours, reduce heat a bit and cover. Steam for around 3 minutes or until the broccoli is _just_ tender, no more.

Photo Sharing and Video Hosting at PhotobucketWhile the pasta is cooking and the broccoli is steaming, puree the garbanzos, red peppers and lemon juice in a blender until smooth, adding a little water (or reserved bean liquid from the can) if needed to make it possible to blend properly. It will be a delightful pinkish colour! Set aside.

When the broccoli is done, remove it from pan and set aside.

Add the tomatoes to the pan with a couple of Tbsp water, cover and cook around 4 or 5 minutes.

Add the broccoli to the tomatoes and stir very well, carefully reheating the broccoli but not letting it overcook. Broccoli should be still a little resistant rather than soft.

Stir the garbanzo mixture into the cooked pasta. Spread the coated pasta on a serving dish and sprinkle with pepper. Add the broccoli-tomato mixture to the top.

Serve NOW! :) Truly delicious!

Friday, March 16, 2007

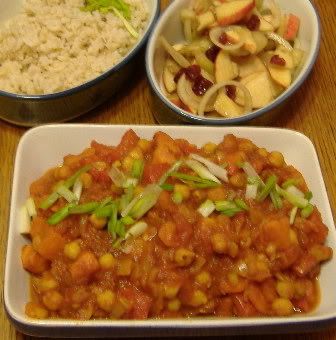
SWEET POTATO & CHICKPEA CURRY, APPLE SALAD

Photo Sharing and Video Hosting at Photobucket


This recipe is adapted from one in Neal Barnard’s Turn Off The Fat Genes (2001), p. 285. Recipes are by Jennifer Raymond.

We halved the recipe, and found that we needed to do quite a bit of fiddling with the spices to get the flavour balance right for us. We also substituted tomato sauce for crushed tomatoes, giving a stronger tomato flavour :)

SWEET POTATO AND CHICKPEA CURRY

1 Tbsp ‘lite’ soy sauce
1 small onion, sliced
1 cup diced sweet potato
1 medium carrot, thinly sliced
1 medium celery stalk, thinly sliced
1/2 red bell pepper, diced
7 ounces (or about half can) tomato sauce (original asked for crushed tomatoes)
1 cup cooked chickpeas/garbanzo beans
1 tsp brown mustard seeds
1/2 tsp turmeeric
1 tsp cumin
1 tsp coriander
1/2 tsp dried ground ginger
1/4 tsp cayenne powder

Brown basmati rice for serving, cooked.

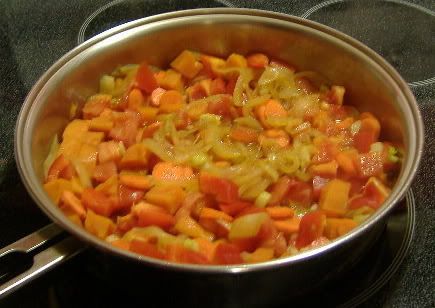
Heat 1/3 cup water and soy sauce and add the oniion and sweet potato. Cook on high for around 5 minutes. Add carrot, celery, and bell pepper and cover for three minutes or so.

Photo Sharing and Video Hosting at Photobucket


Add the tomato sauce (or crushed tomatoes if you prefer), chickpeas and about 1/3 cup water and stir. Add the spices and stir to mix well. Cover, reduce heat to medium, and continue to cook, stirring occasionally. You may need to add a little more water to prevent the mixture sticking to the bottom of the pan.

When the vegetables are tender (around 10 or 12 minutes), your curry is ready to serve with the cooked rice and a salad of your choice. Serves 4.

APPLE SALAD

Photo Sharing and Video Hosting at Photobucket


My APPLE SALAD (above) was a simple one:
1 sliced apple, some thinly sliced raw onion rings, a little thinly sliced cucumber and a spoonful of craisins
dressed in a seasoned rice vinegar and balsamic vinegar (equal amounts)
- but you could make it as elaborate as you please :)

Thursday, March 15, 2007

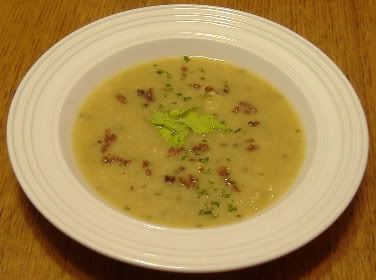
CHEEZY CAULIFLOWER SOUP

Photo Sharing and Video Hosting at Photobucket

I usually make this soup in large quantities in the slow cooker, but it works just as well on top of the stove, of course. The tofu can be added or not, as a matter of choice. This particular batch I made on top of the stove and we enjoyed big bowls of it last evening.

Cheezy Cauliflower Soup (two ways of cooking)

1/2 cauliflower, chopped
1/2 brown cooking onion, chopped
2 cloves garlic, finely chopped
1 large stalk celery, strung and chopped
1 handful fresh parsley, chopped, or 1 Tbsp dried
1 potato, chopped (around 5 ounces weight)
4 cups water or vegetable stock
1 pkg soft silken tofu (optional)
1 Tbsp Braggs liquid
2 Tbsp nutritional yeast flakes
pinch cayenne
1 Tbsp vegan worcestershire-style sauce
pepper and salt to taste
Garnish: chopped parsley and/or celery leaves, chopped chives, vegan bakon bits, etc.

Bring the water or stock to the boil. Add the cauliflower, onion, garlic, celery, parsley and potato, bring to a boil, reduce heat to simmer, cover and continue to cook on simmer until the vegetables are soft. Depending on how small you chopped the vegetables, this could be 10 to 20 minutes. Test a piece of potato to see.

NOTE: For the slow cooker version, place the ingredients as above into your slow cooker or crockpot on high for around 3 hours. Return the blended vegetables to the crockpot still set on high and reheat with the rest of the ingredients for around 20 minutes or until JUST hot.

When done, remove a couple of scoops of the vegetables from the soup and set aside. Blend the rest of the vegetables and stock in batches in a blender. If you use the tofu, add it to the blender along with the soup. (You could of course use a blender wand instead, leaving some vegetables unblended for texture.)

Return the blended soup to the pan, add the vegetables you set aside, set over medium-high heat, and take this opportunity to add a little more water or stock to bring the soup to the desired consistency. This will be depend on your pan and the stove heat - more liquid may have evaporated in the cooking than you prefer. Also, if you choose to use the tofu, the consistency will have changed. Soup should be creamy in substance.

While bringing the soup back to the boil, add the Braggs, nutritional yeast, cayenne, worcestershire sauce, pepper and salt, and stir well. Taste for seasoning and adjust if neeeded.

Garnish and serve with your favourite bread, quickbread or biscuits.

Wednesday, March 14, 2007

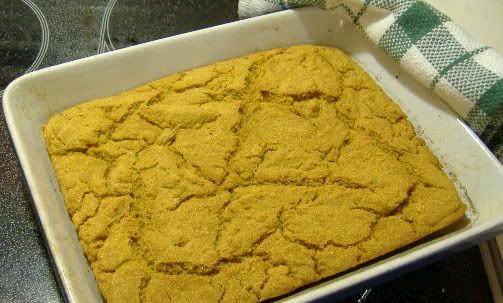
Corn Bread with Chilied Beans

I've always loved corn bread, but I don't exactly like the traditional amounts of oil that go into the preparation of it. Recently, I heard of (and tried) a recipe that substituted a mashed banana for all the fat in the regular recipe (banana cornbread????) and it was delicious. I'll do that again!

Today, I tried a different version - one from one of Neal Barnard's books. It takes a cup of cornmeal but instead of the one-and-a-half cups of wholewheat (or all-purpose) flour, it uses barley flour. I thought 'HUH?' But, never having been misdirected by one of his recommended recipes yet, I gave it a go:

Photo Sharing and Video Hosting at Photobucket

And it was exactly right after 30 minutes. Indeed, we had it a matter of moments later with a great quick bean recipe (same source). Here it is, still steaming hot, crumbly and smelling absolutely wonderful (and tasting even better) at 125 calories a piece, no fat.

Photo Sharing and Video Hosting at Photobucket

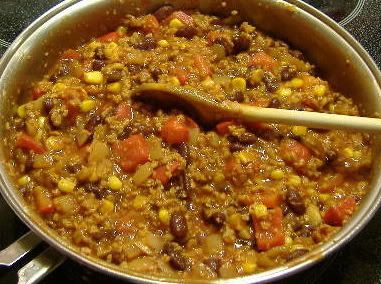
The beans? It was your standard chilied beans, without fat or oil: a chopped onion, a chopped red pepper (because we were out of green), a cup-and-a-half of red kidney beans, a couple of cups of tomato sauce (opened a can from up the cupboard to be quickest), 1 cup tvp granules, 1 cup of frozen corn, plus chili seasonings (faked up my own, because we didn't have the requisite 2 spoons of chilie powder), more cayenne (always more!) and 3 cloves garlic - all cooked nicely in no time at all. When the bread was out of the oven, the beans were ready to serve.

Photo Sharing and Video Hosting at Photobucket

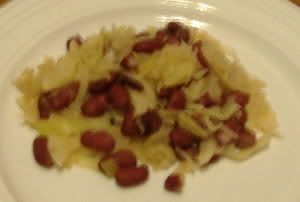
SWEET AND SOUR CABBAGE WITH KIDNEY BEANS

Photo Sharing and Video Hosting at Photobucket


SWEET AND SOUR CABBAGE WITH KIDNEY BEANS

Quick and Easy. Serves 2. Can be doubled, tripled, etc., as needed.

This is adapted from Donna Klein’s Vegan Italiano.

1 medium onion (about 4 or 5 ounces)
1/2 lb cabbage, finely shredded
12 cup vegetable stock (homemade if you have it)
1 cup cooked red kidney beans (I like the dark red), drained (or use half a can, drained)
2 Tbsp red wine vinegar (I use Eden brand)
1 Tbsp turbinado sugar
a few grinds of fresh black pepper
salt to taste

Put the onion together with 1/4 cup water or so in a skillet over medium-high heat and
cook until onions soften, stirring the while (about 4 or 5 minutes). Add the cabbage and the stock, bring to the boil on high, then reduce to a simmer and cover, stirring now and then, for
around 12 to 15 minutes or until the cabbage is tender. It shouldn’t be mushy.

Remove the lid and, if necessary, return to high heat in order to evaporate any excess liquid.

Now add the beans together with the remaining ingredients, stirring until the beans are hot and there is no liquid remaining. This will take a couple of minutes only.

Taste for seasonings and serve over rice, polenta, or grain of your choice. It also tastes remarkably good chilled, so any leftovers make a handy salad dish without further ado. Reheats nicely too!

Tuesday, March 13, 2007

CURRIED PARSNIP SOUP


CURRIED PARSNIP SOUP

A lovely soup for gusty March days - or any time!

This is a HOT AND SPICY* (see below) soup with the strong tang of lemon, which is wonderful if you love, as we do, the tastes of Indian spices (in the garam masala and cayenne) and lemon. Both of these can be adjusted to suit tastes. It owes its existence to several sources, but it is a staple here now and keep avolving a little each time it is made.

1 medium onion, chopped
2 large parsnips, chopped
3 garlic cloves, finely chopped
1/2 - 1 Tbsp garam masala (to taste - try a little at a time)*
1/4 - 1/2 tsp cayenne (or to taste)*
1 rounded Tbsp wholewheat flour
4 cups vegetable stock (homemade, if you have it handy)
grated zest of one lemon
juice of one lemon (OR a little less, depending on size and juiciness of lemon - taste as you go)
freshly ground black pepper
salt? - probably not needed
Garnish: strips of lemon zest and/or chopped cilantro/coriander leaves.

* RE 'HOT AND SPICY' - NOTE ADDED TO ORIGINAL POST 18 MARCH : We like our spicy food, and by that I mean that we have eaten our way around parts of Asia and gobbled the chilies that are sliced, as if they were bell peppers, and strewn profusely on top of some of the already spiced dishes. By 'hot and spicy' I mean BEWARE. Please add your garam masala and cayenne or whatever very carefully, tasting as you go. If you use commercial garam masala mixes, some can be very hot - some less so - and in this they are not unlike commercial 'curry powders' - that is to say they are unreliable in the degree of heat (and btw flavour) you can expect from one brand or type to the next. So, I repeat, if you use these please add them a bit at a time until you get the degree of heat just right.

METHOD:
In a large pan, heat a very little water to cook the onions, parsnips and garlic until softish, stirring for about five minutes. Vegetables should be a little soft but not turning brown. Add the spices and stir well, sprinkle on the flour and stir very well for half a minute and then immediately add the stock, lemon juice and the zest. Taste to establish the degree of sourness you require from the lemon - you can always add more later.

Reduce heat and let simmer for 15 or 20 minutes or until the vegetables are cooked.

Take out a couple of spoonfulls of those vegetables and set aside. You will add them to the finished soup later for texture and interest. (If you prefer a pureed soup, however, you can skip this part and puree the lot. Both are good.)

Either pour the soup into a blender and puree, OR use a magic wand to puree in the pan (watch for splatters if you choose the latter method - there is no magic to avoid burns and stains.). Soup should be lovely and smooth. (As you see above, I chose not to leave chunky bits in mine this time, but to puree the lot. Equally good.)

Re-heat the soup together with those chunkier vegetables you set aside and bring the volume of soup up to 4 cups by adding a little water, if needed.

Taste again for seasoning (Okay? It should not need salt unless you used a salt-free stock)


Serve in heated bowls, add a grind of black pepper and garnish, and cut a nice thick slice of your favourite bread. The one you see here is my homemade wholewheat sourdough, but a slightly sweet quickbread works beautifully too. Very nice and comforting!

Monday, March 12, 2007

THREE-GRAIN CASSEROLE


This was our lunch today.

This recipe is adapted from one in Betty Crocker's _Slow Cooker Cook Book_ 1999 (not veggie, btw, although there is a section on veggie meals and some of the others are veggie too.) I imagine one could cook it on top of the stove without incident, altering liquid amounts and cooking time, for those who know about converting these things. (I haven't yet tried
this with other grains, but I do a variation that includes lentils and different seasonings.)

THREE-GRAIN CASSEROLE

2/3 c. Uncooked Wheat Berries
1/2 cup uncooked wild rice
1/2 cup pot barley
1/3 cup chopped fresh parsley
1 Tbsp grated lemon zest
6 green onions, very thinly sliced
3 cloves garlic
4 cups vegetable stock (homemade if possible)
1/4 cup finely chopped rehydrated sundried tomatoes (or a little more if you like)
*ground cayenne pepper (strictly optional) to add towards the end of cooking, to taste.

Mix all in the crockpot (except not the cayenne just yet), cook on low 4 to 6 hours or until liquid is absorbed - OR on High for 2 1/2 hrs (I did).
Serve with vegetables and salad - and garnish with more parsley and a slice of lemon.


Excellent - and good the next day too. I always freeze some of the rest.

This is said to serve six. We find it is goood for eight, but we are light eaters.

We had it with a tossed green salad and roasted sweet potato slices.

Enjoy!

Friday, March 9, 2007

YELLOW SPLIT-PEA SOUP

[NOTE: This recipe has been edited, Saturday 12 April 2008, since a recent comment indicates the warnings about it being spicy and that the chiles could be omitted were overlooked. Additionally, I have made a note that the cloves could be reduced in number. This is a soup, as is conventional, made from DRIED split peas and I have made that clearer below. Also, I have emphasized that the soup IS a thick one and that you will undoubtedly need to add more liquid as it goes along (depending on your pan, your heat) and perhaps some at the end to thin it out to a consistency coincidental with your personal taste.]
-----
This is a great soup for gusty March evenings.


Rarely a week goes by, except on the hottest of summer days, that we don’t have this soup at least once. Sometimes we serve it with dumplings (added in the last 20 minutes before serving), sometimes with crusty bread. As usual, you’ll note it is a bit on the SPICY side - that’s to our taste. You can be more conventional and OMIT the chiles if you prefer and cut down on the cloves. But for us, that extra zing is what for us sets our version ahead of the rest :)

We made a big pot of this and had some last night. (The soup has the virtue of freezing well.)

YELLOW SPLIT-PEA SOUP

8 cups vegetable stock (homemade if you have it)
1 cup carrots, grated (a couple of carrots, depending on size)
2 large ribs of celery, very finely diced
1/2 brown cooking onion, very finely chopped
3 cloves garlic, minced
2 cups dried yellow split peas
3 bay leaves
7-10 whole cloves (or to taste)
a few grinds black pepper
1 Tbsp fresh parsley, minced (or use a tsp dried)
crushed chiles to taste (we use 1/2 - 1 tsp, depending on our mood)
1/2 tsp Liquid Smoke
Garnish: minced parsley

Put all ingredients in your soup pot, bring to a boil, cover and reduce to a simmer for 50 - 60 minutes or until the lentils are cooked. Check from time to time to stir and make sure the soup doesn’t stick on the bottom of the pan. Add more liquid if needed - and yes, you will need to do this (I always do or it becomes more like a dhal than a soup).

When soup seems done to your satisfaction, taste for seasoning. Remove bay leaves before serving, Garnish with parsley.

We had ours yesterday with some lovely home-made quick bread.

EGGPLANT & MUSHROOM LASAGNA


My own lasagne for our two-person household which always has one of us watching my weight. While this is my standard recipe, I do vary it a bit from time to time - sometimes of necessity. Today I was short on noodles and (gasp!) only had one container of (soft) tofu that wasn't in the freezer, I realized at the last minute. As a result, the topping was a little thin, but the taste was great!

EGGPLANT AND MUSHROOM LASAGNE (includes sauce recipe)
(This serves 2 - and we usually have some left - but can be doubled, trippled, etc. for more. No prob.)

This dish is, however, not recommended for freezing.

Preheat oven to 400 F. Put water on for noodles.

One pound of eggplant - sliced thin and sauteed lightly until tender (steaming works okay) - if I don't have enough eggplant, I slice in zucchini and yellow summer squash too.

One and a half cups homemade tomato pasta sauce (recipe at foot of page - I make up a bunch and freeze mine) OR your favourite commercial sauce (but don't forget to add some chilies or the like).

Quarter pound or more mushrooms - sliced and sauteed/steamed

Half cup mozzarella 'cheez' - grated
Quarter cup parmesan 'cheez' - grated

Half pound tofu (I use firm and thin out with veg. stock) - whooshed in blender and seasoned with salt, pepper, dash of tabasco, half the soy 'parmesan' - other seasonings, your choice.

Quarter cup brown breadcrumbs
Herbs: parsley, thyme, oregano - your pick
salt and pepper to taste.

Lasagna noodles - However many you need for your usual lasagna. I use five or six wholewheat noodles for an 8 by 10 inch baking dish (there are just two of us here) and skimped on the middle layer of noodles). That size dish usually takes 9 or so strips of lasagne.

METHOD:
Cook noodles for around ten minutes while the eggplant is being sauteed.

Lightly sauce the bottom of the baking dish, add layers of noodles, sauce, eggplant, mushrooms, soy 'mozzarella', herbs, salt and pepper, etc. (just as with any lasagne).

Top with tofu mix, then sprinkle on breadcrumbs and soy 'parmesan' and bake for 30 minutes or so or until lasagna is heated through and top has browned.


Let it stand for around 10 or 15 minutes before cutting. Serve with salad of choice.

And now for that pasta sauce I promised you:

QUICK PASTA SAUCE

(I double or triple this amount and freeze in batches)

One medium onion, half a medium carrot, and two or more garlic cloves chopped/grated and sauteed in olive oil.

Two Tablespoons fresh herbs - oregano, thyme - whatever - or use half amt. of dried
1/2 tsp or more to taste of crushed chilies
28 Ounce Can of crushed tomatoes.

Bring to boil, lower heat and simmer for around twenty minutes, longer if you have the time. Sauce should be a bit like sloppy porridge in texture.

There you go - use it to layer between the lasagna layers (above) and/or on your fave pasta :)

Tuesday, March 6, 2007

POLENTA-RATATOUILLE PIE


This recipe is a variation on the Polenta Pie With Spinach I posted here 22 February - posted again for your entertainment and convenience. I had left-over ratatouille from a couple of days ago and thought what to do with it. Because I like things spicy most of the time and also because it would make it different from what we’d recently eaten, I jazzed it up a bit.

POLENTA-RATATOUILLE PIE
(Using Left-Overs)

The filling (I had that - the left-over ratatouille - maybe a couple of cups, give or take - I didn't measure) with extra zing of
Crushed chiles (about a tsp)
1 cup polenta/medium corn meal
3 cups water - or vegetable stock if you prefer
1tsp dried parsley
1 tsp crushed/pulverized garlic
1 - 2 cups Pasta sauce (I had some home made, but you could use your favourite)
A little (just light sprinkles) Vegan parmezan cheez (I used homemade version) - optional

Add the crushed chiles to the left-over ratatouille and keep it warm in a pan while you make the polenta, which is only slightly changed from the previous recipe. The major difference was in halving the recipe since I thought I’d made it a bit heavy the first time.

Bring 3 cups of water (you could use veggie stock and skip the salt) and a pinch of salt to a boil over high heat in a LARGE pot. Slowly add the 1 cup of cornmeal, whisking it in so that it doesn’t go into lumps - or use a wooden spoon, stirring all the while. Add a tsp of dried parsley flakes and a tsp of pulverized garlic and stir well.

Reduce heat to a bare simmer. Cover the pan and cook, stirring now and then, around 15 minutes or until the polenta is cooked.

Remove from the heat but leave it covered for about 5 minutes, during which time preheat your oven to 375 F.

TO ASSEMBLE:
Immediately spoon half of the polenta into a lightly oiled/sprayed pie plate. You will need to use the back of a large spoon to press it down and smooth it out nicely. Spoon the warmed ratatouille filling over the polenta base - to within 1/2 inch of the outside rim of the polenta.

Put the remaining polenta on top, carefully spreading it (I used a knife dipped in cold water again and again) and smooth the surface with the back of your big spoon.

Sprinkle the top with a little vegan parmezan cheeze (or your homemade faux cheez substitute), but this is optional.

Cover with foil and bake 30 minutes. Remove foil and bake another 15 mins or until the top begins to brown a little. Remove from oven and let it settle for another 15 minutes.

Cut into wedges, garnish and accompany with pasta sauce if you are using it.

This was too good to call leftovers! Yummmm!!!! (As you can see, we managed, between us, to make great inroads into it.) Serve with a nice salad of your choice.

I was more pleased with this than with the Polenta Pie With Spinach because it wasn't so heavy on the polenta and also because I just love doing something useful with leftovers :) It WAS hard to photograph, though!

TOMATO CABBAGE SOUP


I make this soup fat-free (although die-hards are welcome to sautee the onions in a couple of Tbsp of oil if they must) and simmer for a bit longer than the stipulated time, since I think the longer these things cook the nicer they are. But for a Quick Fix soup, the time stated here is the one to follow.

TOMATO CABBAAGE SOUP (QUICK AND EASY FIX)

This recipe is easy and can be quickly made - It’s slightly adapted from Sarah Kramer’s _La Dolce Vegan_.

1 small red onion, minced
1/2 tsp caraway seeds
2 garlic cloves, minced
1/2 tsp paprika, or to taste (we added a little more)
1 -14 oz can diced tomatoes
2-1/2 cups vegetable stock
2 cups cabbage, very finely chopped
1/4 tsp ground black pepper or to taste
1 Tbsp apple cider vinegar
1 Tbsp maple syrup
salt, if you use it, to taste

Put all ingredients, except for the vinegar and maple syrup, into a soup pan and bring to the boil. Cover with a lid and reduce the heat so that the soup ingredients simmer gently. After around 20 minutes, Stir in the vinegar and syrup. Salt if you like.

There ya go - a tasty, nutritious, easy soup that will serve a couple of hungry people or twice as many for a first course only.

Serve with a nice hunk of homemade wholewheat sourdough bread.

Can be kept in the fridge for a few days, but not recommended for freezing :( Definitely a keeper!!

Monday, March 5, 2007

CURRIED CAULIFLOWER WITH PEAS


CURRIED CAULIFLOWER AND PEAS

This idea is one I found in Dr Neal Barnard’s _Turn Off The Fat Genes_ (Recipes by Jennifer Raymond). I have adapted it slightly to suit our tastes, but I have left the simplicity of it intact - it would be foolish to try to make it more ‘authentic’ in cooking style, when the whole point would seem to be that it is quick and easy and requires little preparation apart from measuring the spices and chopping the oniion and cauliflower. Despite some misgivings (we tried it at lunchtime today), it was remarkably good and I will probably make it this way again! So easy!!

The original would have made far too much food for us to eat up in several days, so I cut back the amounts.

1/2 large cauliflower, cut into mini-’trees’ rather than florets (ie.bigger and longer)
1/2 tsp ground coriander
3/4 tsp whole brown mustard seed
1/2 tsp ground turmeric
1/2 tsp ground cumin’
cayenne to taste
1/8 tsp cinnamon
1/4 tsp ground ginger
1/2 cup water
1 small onion, chopped
1 cups frozen peas
salt to taste

After rinsing and sectioning the cauliflower, set it aside.
Measure the spices.
Put a small skillet over medium-high heat and roast the spices for about a minute or until
they begin to darken. Don’t let them burn. Set aside.

Put the onions in another skillet large enough to contain all ingredients. Add the water and cook, stirring, over medium-high heat until the onions become soft. Four or five minutes should do it. Stir in the spices.

Now at THIS point you might need to add a little more water so that the spices and onions are in a kind of gravy-like liquid that you can turn the cauliflower in so as to coat the pieces of cauliflower with all these flavours (I did). Put in the cauliflower and keep turning it until they’ve taken on the yellow colour of the spice mix on all sides.

Reduce heat a little and cover and cook until almost tender. (Keep an eye on them, stirring now and then, because you don’t want it to boil dry and burn. Add a tiny bit more water if you think it needs it.)

Then add the frozen peas, stir, and cook until the peas are hot - that should take around a couple of minutes at most.

Salt to taste.

Serve with brown basmati rice, dhal, and kachumber or salad.

Sunday, March 4, 2007

TUSCAN-STYLE BEANS WITH TOMATOES


(Serves 4 as a main dish, up to eight as a side dish)
A Quick Fix.

While this dish is traditionally made with cannellini beans, we use navy beans or northern beans, according to what we have cooked and ready. We make it without olive oil to sautee the garlic, etc. for another fat-free dish which is also quick and easy.

4 or 5 cloves garlic, finely chopped
3-4 cups (two cans, if you prefer them, but rinse and drain) white beans, cooked and drained
1 cup low-sodium vegetable stock, homemade if you have it
14-ounce can of tomatoes, chopped, including juice
a good pinch of dried sage or use four or five fresh sage leaves if you have them handy
salt and pepper to taste

Cook the garlic in a very little water for a few minutes to soften in a large pot, then add all the other ingredients and bring to a boil over medium-high heat.

Reduce heat and simmer - without a lid - for 20 minutes or so, until thickened nicely. Give it a good stir now and then while it does this. When the mixture is lovely and moist but no longer runny it's done. Easy and delicious.